Using System Restore has been a life-saver in the past. I’ve noticed though, that Windows 10 doesn’t seem to create a restore point very often (more below on this). When I’ve wanted to use it a couple of times, there was only one restore point. This post will show you how to set and schedule Windows restore points onWindows 10.
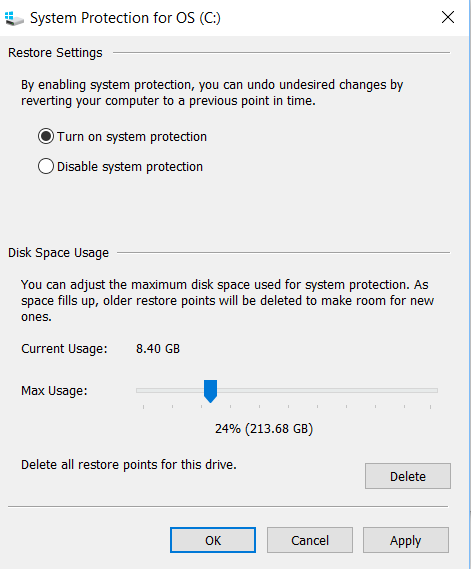
First, pull up your System Restore and make sure it is enabled. Type in System Restore in the windows box. Then click on the Configure button. This will show you if system restore is enabled for your system.

I’ve got my disk space at 24%. If it’s set too low, then there won’t be enough room to have the system run the restore points. You can see 24% is 213GB for my system. For some systems, just sliding the bar over will let your system set more restore points. These restore points do take up space. To clear up some space, you can go in and delete some of your restore points. Yes, this is a manual process.
 Set Up A Task To Make Regular Restore Points
Windows is set to automatically create a restore point before installing any updates, but my system hasn’t been doing it – perhaps because my max usage was set too low.
Here’s a way to set up a scheduled task (Task Scheduler) and have Windows back up your computer on a schedule.
Type Task Scheduler into the Windows task bar, when it comes up, Click the arrow beside Task Scheduler library, then click Microsoft, then click Windows, then scroll down to System Restore and doubleclick.
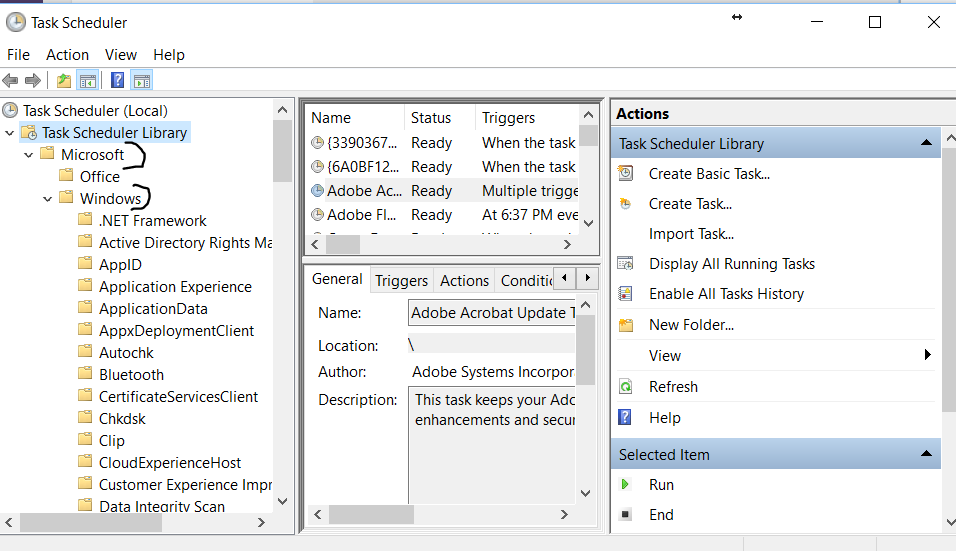
 Configure Settings on Task Scheduler
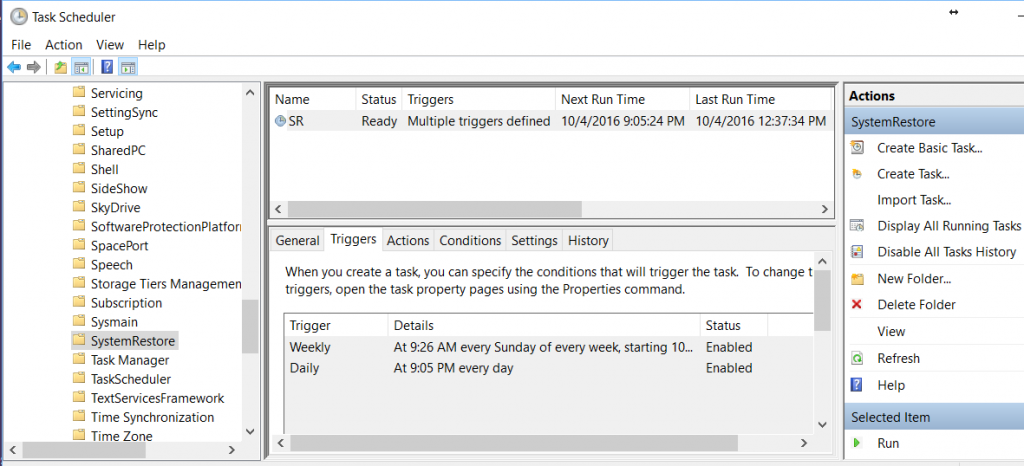
Now you’ll see a single item in the middle pane that says “SR Queued Multiple triggers defined”. Double-click on that item and we’ll change the details.
Click the Triggers tab and click on new or edit and here’s where you click the radio buttons to decide what day(s) of the week you want a restore point created and how often it will recur (one time, daily, etc.).
Click the Conditions – here’s where you specify the conditions, along with the trigger that determines when the task will run.
Make sure the History is enabled. I noticed mine wasn’t. That will let you know if your scheduled event ran.
 Key Takeaway on System Restore
Going to ‘System Restore’ and simply enabling this feature and making sure you have enough disk space for your system to make restore points is the key takeaway here.
Since Windows defaults to setting a restore point before an update, you will at least be able to go back in time to that.
If you’re going to try something hinky/different, take a moment to set a manual restore point before your experiment! Good luck!